I used nginx configs and agent config - all worked for me, Centos 7
Zabbix 2.2 верхом на nginx + php-fpm и mariadb tutorial recovery mode

Хочу отметить, что эта инструкция родилась в процессе внедрения Zabbix в стенах компании Acronis.
В процессе экспертизы и проведенных мною исследований, она доказала свое право на жизнь и благополучно служит нам верой и правдой день изо дня.
Перед нами стоит нетривиальная задача, добиться максимальной производительности известной системы мониторинга zabbix.
Среди многих статей в интернете, есть много описаний типовых установок этой системы. Я подробно опишу, как заставить работать zabbix быстрее.
В качестве базовой системы я буду использовать CentOS 6.4. Так же как и многие я люблю Debian, Gentoo и все остальные дистрибутивы, но эта статья именно для CentOS.
Все что нужно делать я распишу подробно и шаг за шагом, и начнем с базовой настройки нашего CentOS
# Выключаем SELINUX
sed -i 's/SELINUX=enforcing/SELINUX=disabled/g' /etc/selinux/config# Настраиваем часовой пояс
ln -sf /usr/share/zoneinfo/Europe/Moscow /etc/localtime# Запускаем синхронизацию времени
yum install ntp -y
chkconfig ntpd on
/etc/init.d/ntpd stop
ntpdate 0.ru.pool.ntp.org 1.ru.pool.ntp.org 2.ru.pool.ntp.org 3.ru.pool.ntp.org
/etc/init.d/ntpd start
# Устанавливаем вспомогательные компоненты
yum install wget nano wget ntpdate -y # Эти репозитории должны быть, очень много пакетов что нет в базовых репозиториях, мы найдем тут
wget dl.fedoraproject.org/pub/epel/6/x86_64/epel-release-6-8.noarch.rpm
wget rpms.famillecollet.com/enterprise/remi-release-6.rpm
sudo rpm -Uvh remi-release-6*.rpm epel-release-6*.rpm
rm *.rpm -f
# Этот репозиторий нам пригодится но мы его выключим по умолчанию
rpm --import dag.wieers.com/rpm/packages/RPM-GPG-KEY.dag.txt
cd /tmp
wget dag.wieers.com/rpm/packages/rpmforge-release/rpmforge-release-0.3.6-1.el5.rf.x86_64.rpm && rpm -ivh rpmforge-release-0.3.6-1.el5.rf.x86_64.rpm
# Выключаем, будем использовать через --enablerepo=rpmforge
sed -i 's/enabled = 1/enabled = 0/g' /etc/yum.repos.d/rpmforge.repo# А вот это жемчужина для web систем и не только, тут действительно есть очень много того, что нужно администратору в своей работе. MustHave
wget -q -O - http://www.atomicorp.com/installers/atomic | sh# Ставим полезный софт
yum install nano mc screen sudo nscd htop ntp zip unzip pigz iotop sysstat lsof strace atop multitail -y
yum --enablerepo=rpmforge install htop -y
# Обновляем систему
yum update -yТеперь перейдем к установке самого zabbix и требуемых ему компонентов:
SERVER
# Установим официальный репозиторий zabbix для centos
rpm -ivh http://repo.zabbix.com/zabbix/2.2/rhel/6/x86_64/zabbix-release-2.2-1.el6.noarch.rpm# Убиваем все старые компоненты MySQL, Это удалит MySQL!
yum remove php-* mysql-* MariaDB-* -y# Устанавливаем mariadb из репозитория atomic
yum install mariadb-server mariadb-devel mariadb-client -y# Устанавливаем много компонентов и модулей которые нужны для работы zabbix
yum install ntp php php-mysql php-mbstring php-mcrypt rpm-build gcc mariadb-devel openssl-devel cyrus-sasl-devel pkgconfig zlib-devel pcre-devel openldap-devel postgresql-devel expect libtool-ltdl-devel openldap-servers libtool gdbm-devel pam-devel gamin-devel php-fpm php-cli php-gd php-imap php-ldap php-odbc php-pear php-xml php-xmlrpc php-pecl-apc hp-magpierss php-snmp php-tidy spawn-fcgi openssl perl-TimeDate webalizer perl-DateTime-Format-HTTP perl-DateTime-Format-Builder perl-TimeDate libevent-devel php-pecl-memcache nginx cronie cronie-anacron crontabs postfix sysstat -y
# Устанавливаем сам zabbix
yum install zabbix-server-mysql zabbix-web-mysql zabbix-agent
# Настраиваем MariaDB, нужно привести ее конфиг к такому виду (эти конфиг расчитан на 16ГБ ОЗУ на сервере)
[root@zabbix ~] nano /etc/my.cnf
[mysqld]
datadir=/var/lib/mysql
socket=/var/lib/mysql/mysql.sock
# Disabling symbolic-links is recommended to prevent assorted security risks
symbolic-links=0
default_storage_engine=InnoDB
innodb_file_per_table = 1
#
#
# network
connect_timeout = 60
wait_timeout = 28800
max_connections = 200
max_allowed_packet = 512M
max_connect_errors = 1000
# limits
tmp_table_size = 512M
max_heap_table_size = 256M
table_cache = 1024
# logs
log_error = /var/log/mysql/mysql-error.log
#slow_query_log_file = /var/log/mysql/mysql-slow.log
#slow_query_log = 1
#long_query_time = 20
# innodb
default_storage_engine=InnoDB
innodb_file_per_table = 1
innodb_status_file = 1
innodb_additional_mem_pool_size = 128M
innodb_buffer_pool_size = 12G # Значение этого параметра должно быть не более 60% от объема ОЗУ на сервере
innodb_flush_method = O_DIRECT
innodb_io_capacity = 2000
innodb_flush_log_at_trx_commit = 2
innodb_support_xa = 0
innodb_log_buffer_size = 128M
# experimental
innodb_stats_update_need_lock = 0
# other stuff
event_scheduler = 1
query_cache_type = 0
query_cache_size = 536870912
join_buffer_size=1M
query_cache_limit=2M
sort_buffer_size=2M
read_buffer_size=2M
read_rnd_buffer_size=4M
key_buffer = 256M
key_buffer_size=64M
open_files_limit = 100000
thread_cache_size = 100
[mysqld_safe]
log-error=/var/log/mysqld.log
pid-file=/var/run/mysqld/mysqld.pid
#
# include all files from the config directory
#
!includedir /etc/my.cnf.d
# Добавляем mysql в автозагрузку
chkconfig mysqld on && /etc/init.d/mysqld restart# Добавляем php-fpm в автозагрузку
chkconfig --levels 235 php-fpm on
/etc/init.d/php-fpm start
# Удаляем конфиги по умолчанию nginx
rm /etc/nginx/conf.d/default.conf -f
rm /etc/nginx/conf.d/virtual.conf -f
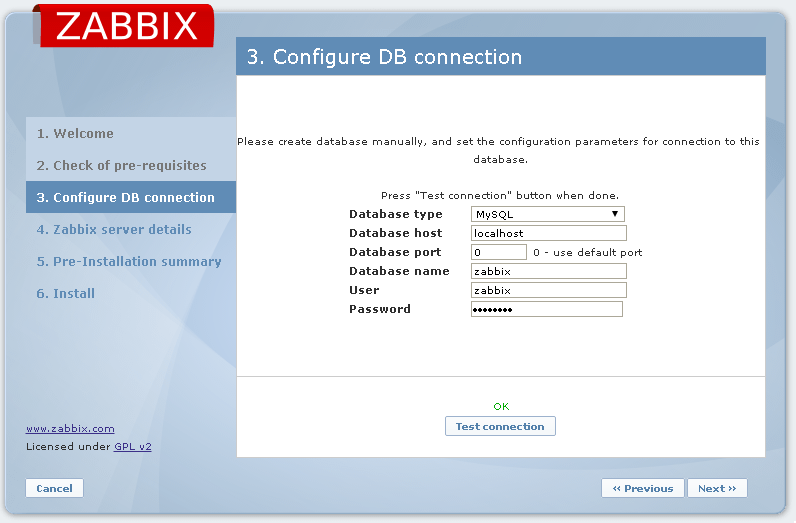
# Создаем базу zabbix
mysql -e 'CREATE DATABASE zabbix CHARACTER SET utf8 COLLATE utf8_bin;'
mysql -e 'grant all privileges on zabbix.* to zabbix@localhost identified by «9c9yUiUuros»;'
mysql -e 'flush privileges;'
# Заливаем стандартные схемы для базы zabbix
mysql zabbix < /usr/share/doc/zabbix-server-mysql-2.2.0/create/schema.sql
mysql zabbix < /usr/share/doc/zabbix-server-mysql-2.2.0/create/images.sql
mysql zabbix < /usr/share/doc/zabbix-server-mysql-2.2.0/create/data.sql
# Добавляем правила iptables
iptables -A INPUT -p tcp -m state --state NEW -m tcp --dport 10050 -j ACCEPT
iptables -A INPUT -p tcp -m state --state NEW -m tcp --dport 10051 -j ACCEPT
iptables -A INPUT -p udp -m state --state NEW -m udp --dport 10050 -j ACCEPT
iptables -A INPUT -p udp -m state --state NEW -m udp --dport 10051 -j ACCEPT
iptables -A INPUT -p tcp -m state --state NEW -m tcp --dport 80 -j ACCEPT
service iptables save
# Внесем обязательные изменения в конфигурацию php
[root@zabbix ~] nano /etc/php.ini
post_max_size = 16M
max_execution_time = 300
max_input_time = 300
date.timezone = Europe/Moscow
# Приведем конфигурациию zabbix к следующему виду:
egrep -v '^#|^$' /etc/zabbix/zabbix_server.conf
[root@zabbix ~] nano /etc/zabbix/zabbix_server.conf
LogFile=/var/log/zabbix/zabbix_server.log
LogFileSize=0
PidFile=/var/run/zabbix/zabbix_server.pid
DBName=zabbix
DBUser=zabbix
DBUser=zabbix
DBPassword=9c9yUiUuros
DBSocket=/var/lib/mysql/mysql.sock
SNMPTrapperFile=/var/log/snmptt/snmptt.log
AlertScriptsPath=/usr/lib/zabbix/alertscripts
ExternalScripts=/usr/lib/zabbix/externalscripts
# Добавляем сервер zabbix в автозагрузку
chkconfig zabbix-server on# Немного изменим стандартную конфигурацию nginx, приведем конфиг к такому виду:
[root@zabbix ~] nano /etc/nginx/nginx.conf
user nginx;
worker_processes 10;
pid /var/run/nginx.pid;
events {
worker_connections 1024;
use epoll;
multi_accept on;
}
error_log /var/log/nginx/error.log warn;
http {
include /etc/nginx/mime.types;
default_type application/octet-stream;
log_format main '$remote_addr — $remote_user [$time_local] "$request" '
'$status $body_bytes_sent "$http_referer" '
'"$http_user_agent" "$http_x_forwarded_for"';
access_log /var/log/nginx/access.log main;
connection_pool_size 256;
client_header_buffer_size 4k;
client_max_body_size 100m;
large_client_header_buffers 8 8k;
request_pool_size 4k;
output_buffers 1 32k;
postpone_output 1460;
proxy_max_temp_file_size 0;
gzip on;
gzip_min_length 1024;
gzip_proxied any;
gzip_proxied expired no-cache no-store private auth;
gzip_types text/plain text/xml application/xml application/x-javascript text/javascript text/css text/json;
gzip_comp_level 8;
gzip_disable «MSIE [1-6]\.(?!.*SV1)»;
sendfile on;
tcp_nopush on;
tcp_nodelay on;
keepalive_timeout 75 20;
server_names_hash_max_size 8192;
ignore_invalid_headers on;
server_name_in_redirect off;
proxy_buffer_size 8k;
proxy_buffers 32 4k;
proxy_connect_timeout 1000;
proxy_read_timeout 12000;
proxy_send_timeout 12000;
proxy_cache_path /var/cache/nginx levels=2 keys_zone=pagecache:5m inactive=10m max_size=50m;
real_ip_header X-Real-IP;
proxy_set_header Host $host;
proxy_set_header X-Real-IP $remote_addr;
proxy_set_header X-Forwarded-For $proxy_add_x_forwarded_for;
allow all;
include /etc/nginx/conf.d/*.conf;
}
# Настраиваем nginx на работу с zabbix и php-fpm
[root@zabbix ~]# nano /etc/nginx/conf.d/zabbix.conf
server {
listen 80;
server_name имя;
server_name другое имя;
location / {
root /usr/share/zabbix;
index index.php index.html index.htm;
}
location ~ \.php$ {
root /usr/share/zabbix;
try_files $uri =404;
fastcgi_pass 127.0.0.1:9000;
fastcgi_index index.php;
fastcgi_buffers 4 256k;
fastcgi_busy_buffers_size 256k;
fastcgi_temp_file_write_size 256k;
fastcgi_param SCRIPT_FILENAME $document_root$fastcgi_script_name;
include fastcgi_params;
}
# deny access to .htaccess files, if Apache's document root
# concurs with nginx's one
#
location ~ /\.ht {
deny all;
}
}
server {
listen 80;
server_name _;
location / {
root /usr/share/zabbix;
index index.php index.html index.htm;
}
location ~ \.php$ {
root /usr/share/zabbix;
try_files $uri =404;
fastcgi_pass 127.0.0.1:9000;
fastcgi_index index.php;
fastcgi_param SCRIPT_FILENAME $document_root$fastcgi_script_name;
include fastcgi_params;
}
# deny access to .htaccess files, if Apache's document root
# concurs with nginx's one
#
location ~ /\.ht {
deny all;
}
}
# Убираем из автозагрузки apache
chkconfig --levels 235 httpd off
/etc/init.d/httpd stop
# Добавляем nginx в автозагрузку
chkconfig --levels 235 nginx on
/etc/init.d/nginx start
After install:
mysql zabbix
MariaDB [zabbix]> update users set passwd=md5('New Password') where alias='Admin';
Вот таким простым методом, мы получаем высокопроизводительную установку zabbix.
Статья была бы не полной, если бы я не сказал об установке zabbix-proxy и zabbix-agent, предполагается что шаги базовой настройки системы (в самом начале статьи) мы уже прошли
PROXY
# Установим официальный репозиторий zabbix для centos
rpm -ivh http://repo.zabbix.com/zabbix/2.0/rhel/6/x86_64/zabbix-release-2.0-1.el6.noarch.rpm# Удаляем старый софт
yum remove zabbix-proxy-* -y
yum remove mysql* mysql-*
# Устанавливаем mariadb из репозитория atomic
yum install mariadb-server mariadb-devel mariadb-client -y# После удаления компонентов mysql, могли удалиться важные компоненты
yum install -y cronie cronie-anacron crontabs postfix sysstat# Собственно сам zabbix из официального репозитория
yum install zabbix zabbix-agent zabbix-proxy-mysql zabbix-proxy -yРассмотрим случай, что zabbix-proxy нужно поставить на чем то другом, например fedora 14
mkdir /root/zabbix && cd /root/zabbix
wget repo.zabbix.com/zabbix/2.0/rhel/6/x86_64/zabbix-2.0.9-1.el6.x86_64.rpm
wget repo.zabbix.com/zabbix/2.0/rhel/6/x86_64/zabbix-agent-2.0.9-1.el6.x86_64.rpm
wget repo.zabbix.com/zabbix/2.0/rhel/6/x86_64/zabbix-proxy-2.0.9-1.el6.x86_64.rpm
wget repo.zabbix.com/zabbix/2.0/rhel/6/x86_64/zabbix-proxy-mysql-2.0.9-1.el6.x86_64.rpm
wget repo.zabbix.com/zabbix/2.0/rhel/6/x86_64/zabbix-get-2.0.9-1.el6.x86_64.rpm
rpm -Uhv *.rpm
# Настраиваем MariaDB, нужно добавить параметры
[root@zabbix ~] nano /etc/my.cnf
default_storage_engine=InnoDB
innodb_file_per_table = 1
# Добавляем zabbix в автозагрузку
chkconfig zabbix-proxy on
chkconfig zabbix-agent on
chkconfig mysqld on && /etc/init.d/mysqld start
# Создаем базу
mysql -e 'CREATE DATABASE zabbix CHARACTER SET utf8 COLLATE utf8_bin;'
mysql -e 'grant all privileges on zabbix.* to zabbix@localhost identified by «lNZrKeZASv0L»;'
mysql -e 'flush privileges;'
# Заливаем стандартные схемы для базы zabbix
mysql zabbix < /usr/share/doc/zabbix-server-mysql-2.0.9/create/schema.sql
mysql zabbix < /usr/share/doc/zabbix-server-mysql-2.0.9/create/images.sql
# Добавляем правила iptables
iptables -A INPUT -p tcp -m state --state NEW -m tcp --dport 10050 -j ACCEPT
iptables -A INPUT -p tcp -m state --state NEW -m tcp --dport 10051 -j ACCEPT
iptables -A INPUT -p udp -m state --state NEW -m udp --dport 10050 -j ACCEPT
iptables -A INPUT -p udp -m state --state NEW -m udp --dport 10051 -j ACCEPT
service iptables save
# Настраиваем сам zabbix-proxy
sed -i «s/^Server=.*/Server=адрес-сервера-zabbix/g» /etc/zabbix/zabbix_proxy.conf
sed -i «s/^Hostname=.*/Hostname=имя-этого-прокси-который-указали-zabbix-server/g» /etc/zabbix/zabbix_proxy.conf
sed -i «s/^DBName=.*/DBName=zabbix/g» /etc/zabbix/zabbix_proxy.conf
echo ProxyMode=0 >> /etc/zabbix/zabbix_proxy.conf
echo ProxyLocalBuffer=1 >> /etc/zabbix/zabbix_proxy.conf
echo ProxyLocalBuffer=ProxyOfflineBuffer=100 >> /etc/zabbix/zabbix_proxy.conf
echo HousekeepingFrequency=1r=100 >> /etc/zabbix/zabbix_proxy.conf
echo DataSenderFrequency=300 >> /etc/zabbix/zabbix_proxy.conf
echo StartPollers=5 >> /etc/zabbix/zabbix_proxy.conf
echo StartIPMIPollers=1 >> /etc/zabbix/zabbix_proxy.conf
echo StartPollersUnreachable=1 >> /etc/zabbix/zabbix_proxy.conf
echo StartTrappers=5 >> /etc/zabbix/zabbix_proxy.conf
echo StartHTTPPollers=1 >> /etc/zabbix/zabbix_proxy.conf
echo StartDBSyncers=4 >> /etc/zabbix/zabbix_proxy.conf
echo Timeout=10 >> /etc/zabbix/zabbix_proxy.conf
echo FpingLocation=/usr/sbin/fping >> /etc/zabbix/zabbix_proxy.conf
echo Fping6Location=/usr/sbin/fping6 >> /etc/zabbix/zabbix_proxy.conf
echo DebugLevel=3 >> /etc/zabbix/zabbix_proxy.conf
echo StartDiscoverers=10 >> /etc/zabbix/zabbix_proxy.conf
echo DBPassword=lNZrKeZASv0L >> /etc/zabbix/zabbix_proxy.conf
# Проверяем конфигурационный файл zabbix-proxy
egrep -v '^#|^$' /etc/zabbix/zabbix_proxy.conf# Поехали
/etc/init.d/zabbix-proxy start
AGENT, очевидно мы будем его разворачивать через chef или puppet но для полноты материала
# Установим официальный репозиторий zabbix для centos
rpm -ivh http://repo.zabbix.com/zabbix/2.0/rhel/6/x86_64/zabbix-release-2.0-1.el6.noarch.rpm# Устанавливаем агента из официального репозитория
yum install zabbix zabbix-agent -yили если у Вас не очень свежая fedora
rpm -Uhv http://repo.zabbix.com/zabbix/2.0/rhel/6/x86_64/zabbix-2.0.9-1.el6.x86_64.rpm# Даем пользователю zabbix права sudo и создаем папки для наших будущих скриптов
usermod -s /bin/bash zabbix
echo 'zabbix ALL=(ALL) NOPASSWD: ALL' >> /etc/sudoers
sed -i 's/Defaults\ requiretty/#Defaults\ requiretty/g' /etc/sudoers
mkdir /etc/zabbix/scripts/
chmod 750 /etc/zabbix/scripts/
# Добавляем zabbix-agent в автозагрузку
chkconfig zabbix-agent on# Добавляем правила iptables
iptables -A INPUT -p tcp -m state --state NEW -m tcp --dport 10050 -j ACCEPT
iptables -A INPUT -p tcp -m state --state NEW -m tcp --dport 10051 -j ACCEPT
iptables -A INPUT -p udp -m state --state NEW -m udp --dport 10050 -j ACCEPT
iptables -A INPUT -p udp -m state --state NEW -m udp --dport 10051 -j ACCEPT
service iptables save
# Настраиваем нашего zabbix-agent
sed -i «s/^Server=.*/Server=адрес-zabbix-sever-или-proxy/g» /etc/zabbix/zabbix_agentd.conf
sed -i «s/^ServerActive=.*/ServerActive=адрес-zabbix-sever-или-proxy/g» /etc/zabbix/zabbix_agentd.conf
sed -i «s/^Hostname=.*/Hostname=`hostname`/g» /etc/zabbix/zabbix_agentd.conf
echo EnableRemoteCommands=1 >> /etc/zabbix/zabbix_agentd.conf
echo LogRemoteCommands=1 >> /etc/zabbix/zabbix_agentd.conf
echo Timeout=30 >> /etc/zabbix/zabbix_agentd.conf
# Готово, наблюдаем логи
/etc/init.d/zabbix-agent restart && tail -f -n 100 /var/log/zabbix/zabbix_*.logСпасибо за Ваше внимание, если Вы сочтете этот материал интересным, то я буду рад поделиться еще многим и многим!